

Alternator rebuild

Rebuilding an alternator (3.4L but others will be much the same).
Parts - brush only:
https://www.mighty90s.com/90seriesspares/?part=LC90_eng_altbrush-toy
Parts - rebuild kit:
https://www.mighty90s.com/90seriesspares/?part=LC90_alt_rebuild
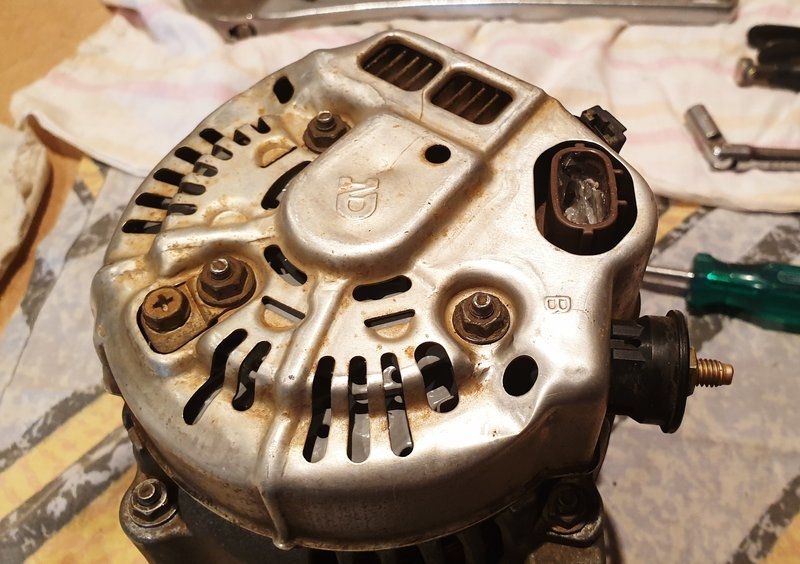
First thing you'll want to do is open this side and look for clues of what has failed. Hopefully it's just the brushes.... or could be the more expensive parts; regulator or rectifier.
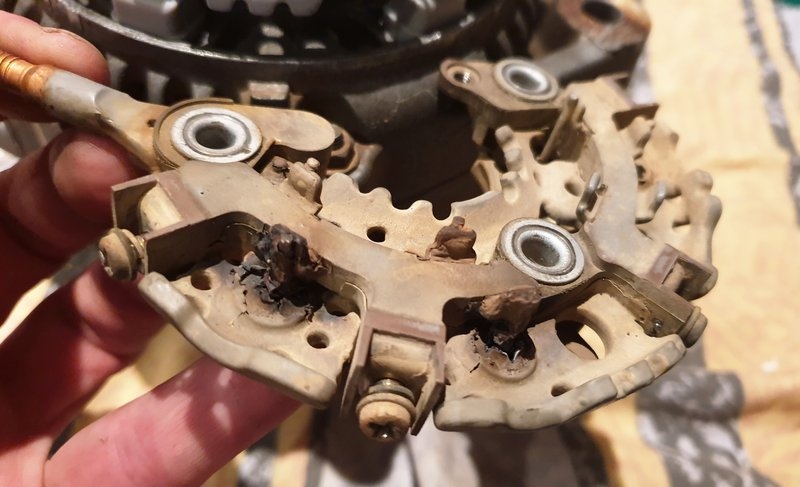
In my case it was the rectifier - note the burnt out section:
Comments
You may go further and replace bearings. In my case I'm doing a complete rebuild on 2 alternators - main and a spare.
To go deeper we must remove the pulley and separate the housing - sorry no photos of this.
Pulley requires jamming something inside to stop the rotor (main internal part) from rotating.
Separating the housing was pretty easy by tapping the pulley side of the rotor with a hammer. The rotor slid out of the pulley side housing/bearing quite easily. Leaving the rotor still attached to the brush side of the housing.
Here we have the pulley side of the housing. Bearing is hiding behind the plate in the centre. Plate is held by 4 phillips head screws (already removed in photo). Be very careful when undoing these screws as replacements are no longer available!
Old and new bearings:
New bearing installed - pulley side:
Next we push the rotor from the brush side of the housing using a 75mm puller.
There's very little clearance to remove the bearing from the rotor, so I broke the rules a bit in order to make this 75mm puller do the job. In a perfect world you'd use a proper bearing puller (if you can find one small enough) or make up a special tool. However, it came out easily with this method (on 2 alternators).
Cleaning up the contact area of the rotor.
Here we have new bearings installed. These are NSK bearings. I'll be rebuilding the second with Toyota bearings (which are Koyo in this particular case). I pushed the bearing on with a long socket and a hammer. Before installing the bearing do test the socket depth clearance first - my socket didn't quite reach the whole way, so a ring spanner was also used (bearing>ring>socket>hammer).
Bringing housings together requires a little tapping. Mine didn't want to come together perfectly, which could be forced by tightening the housing nuts, but it's indicative of an issue. I opened again and eventually found the brush side bearing needed to be pressed on just a tad further, then it assembled perfectly.
Now assembling the brush side with new seal and insulators:
New rectifier installed with new screws. These screws were probably the easiest to damage during disassembly.
New brush holder installed, brush cover, original regulator and grease applied to plug:
Closed:
.
Some of the parts used, which you can buy from here:
https://www.mighty90s.com/90seriesspares/?part=LC90_alt_rebuild
(reserved)