

Starter Motor Rebuild
- Have you been in mud and your Prado or other Toyota 4WD won't start afterwards? You'll need to clean the mud out of your starter contacts and/or brushes.
- Does your starter just click when you turn the key but the motor won't start? If it's not a flat battery, the contacts may be worn.
- Does the starter motor make a whirring sound but not turn over the engine? It might be the bendix gear.
If you answered yes to any of these, you might need to clean or rebuild your starter.
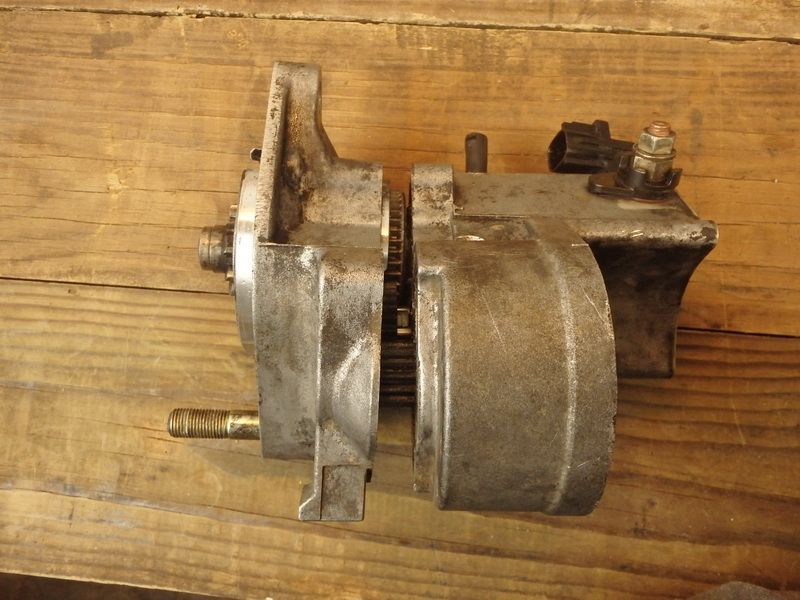
The Denso starters motors that Toyota use can be rebuilt with a few hand tools. The Following is the 2kW starter out of the 1KZ-TE diesel. The basic design of the Denso starter is similar no matter if it is from a Yarris or one of the 4WD's and sometimes other makes and models
Removal:
Disconnect the battery
Take the left side wheel off (Passenger side in Aus/NZ/UK or Drivers Side in Europe).
Disconnect the battery then disconnect the Plug on the lower side of the starter
Remove the bolt holding on the cable from the battery.
To remove the starter you need to undo a bolt that goes from the starter to the bellhousing (Where the bracket holding the clutch hydraulic pipe/hose) and a nut that is on the belhousing side. You'll need a 17mm spanner and a bit of muscle.
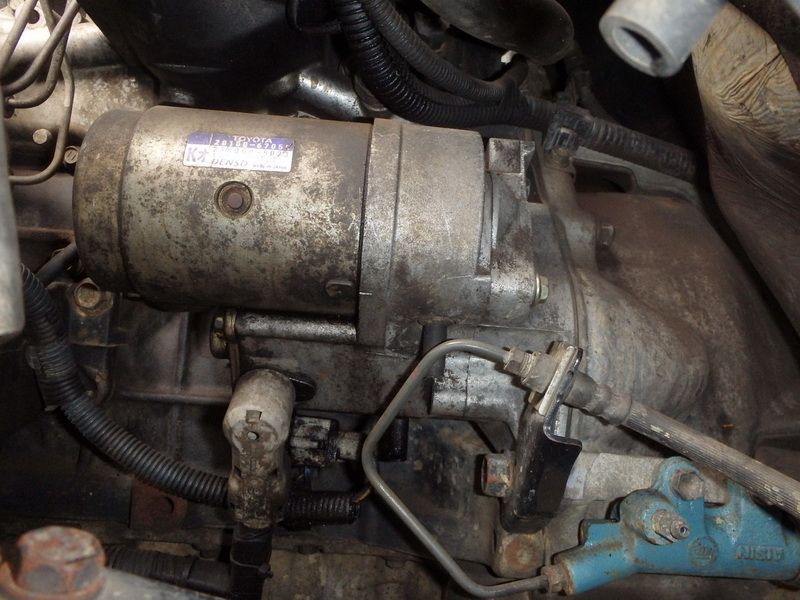
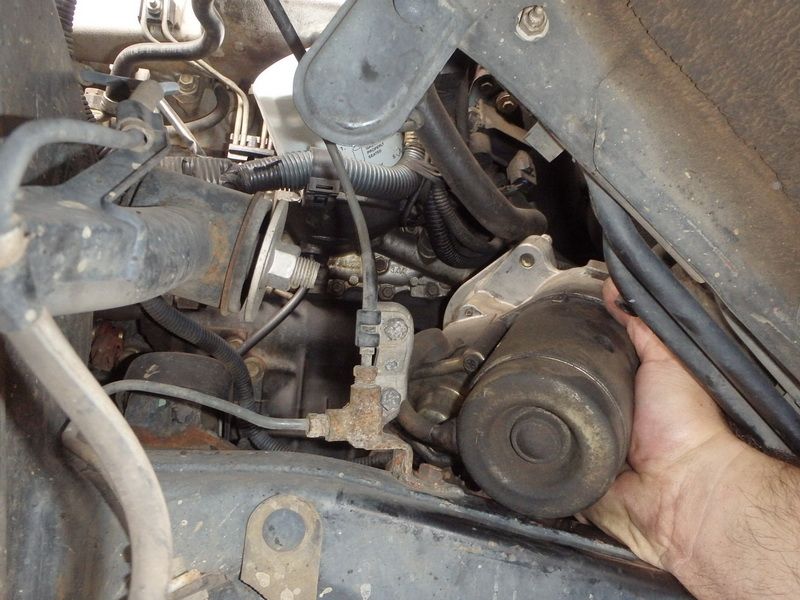
Pull the starter out through the wheel arch.
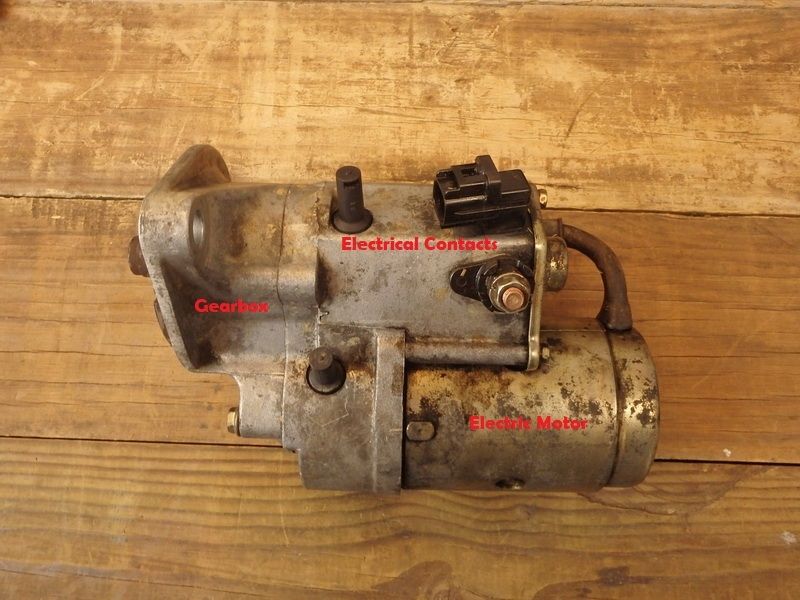
At this point, I should mention that there are 3 main parts of the Starter.
1.Electric Motor
2. Electrical Contacts
3. Gearbox
Electric Motor:
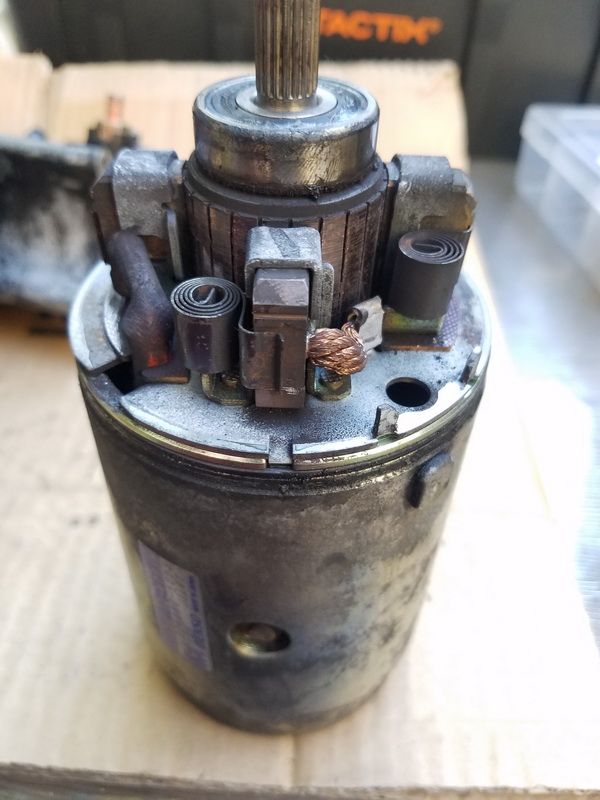
To remove the motor, there are 2x 10mm bolts at the pinion gear end of the starter (seen on LHS of photo). Undo these and you'll be able to remove the starter. You'll need access here if you are going to inspect the brushes.

<I'll add info on replacing brushes later>
The starter in the next photo shows 3 of the 4 brushes at the top. They are held in with spring clips and do not need replacing on this starter.
Electrical Contacts:
If you go to start the car and just det a dull clicking sound, chances are the plunger and contacts are worn (assuming your battery isn't flat). The solenoid in the starter is basically a remote switch that can handle high current, much higher than your headlight or driving lights relay.
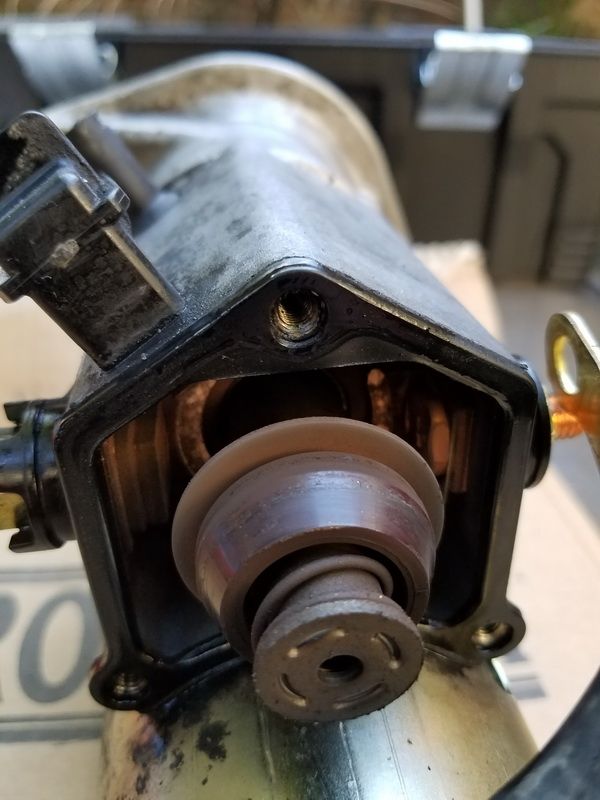
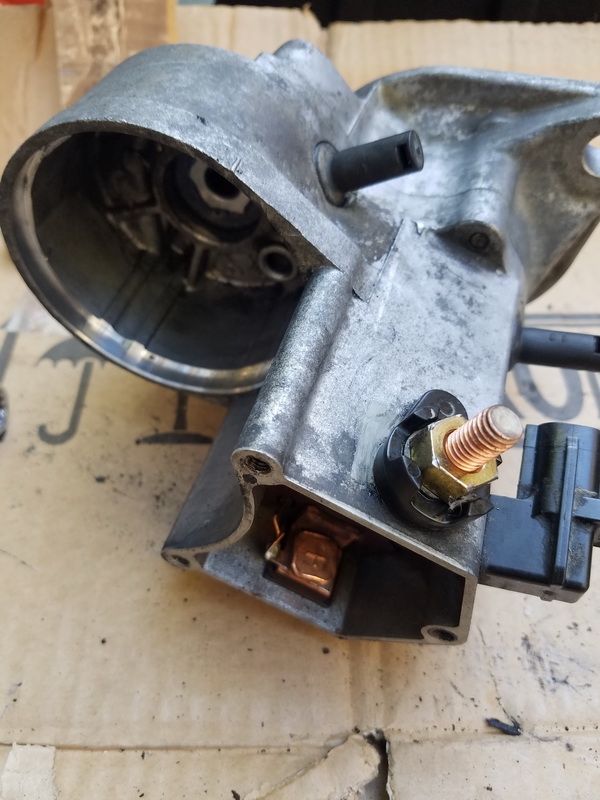
There are 3x 8mm bolts that hold a cover on the end of the electrical contacts section of the starter. Remove these, put the cover and rubber gasket aside. you'll see a plunger that you can remove with a spring at the bottom of a shaft.
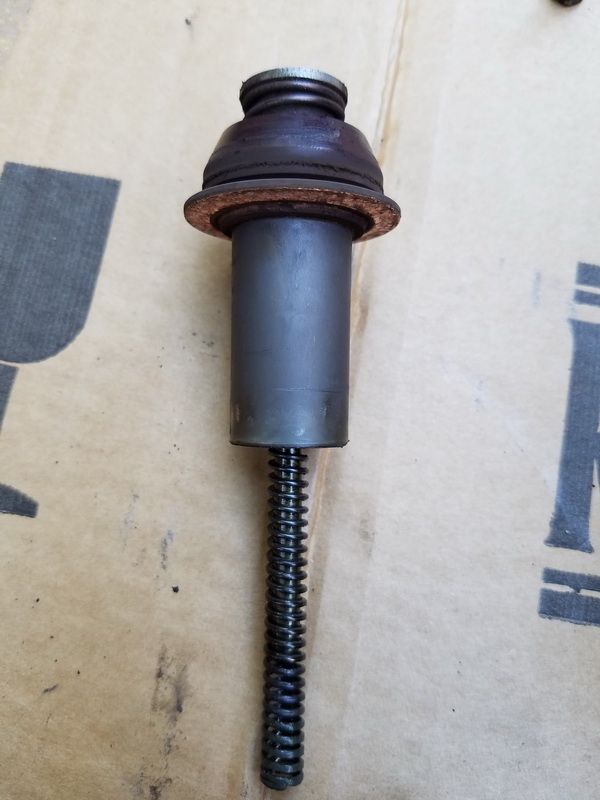
Inspect the disk (Top of next photo) and make sure that it isn't too thin or unevenly worn. This one is servicable, the disk is solidly attached and is evenly worn. If you replace this, be warned that there are reports of non-genuine Toyota plungers where the disk comes loose.
Diving deeper into the electrical contacts area of the starter will reveal the contacts themselves seen in the next photo as shiny semi-circular bits of copper. The one on the left in this photo is attached to the cable from the battery with the one on the right is connected to power the electric motor. When the plunger is pulled towards those 2 contacts, the current will flow from the battery side to the electric motor side.
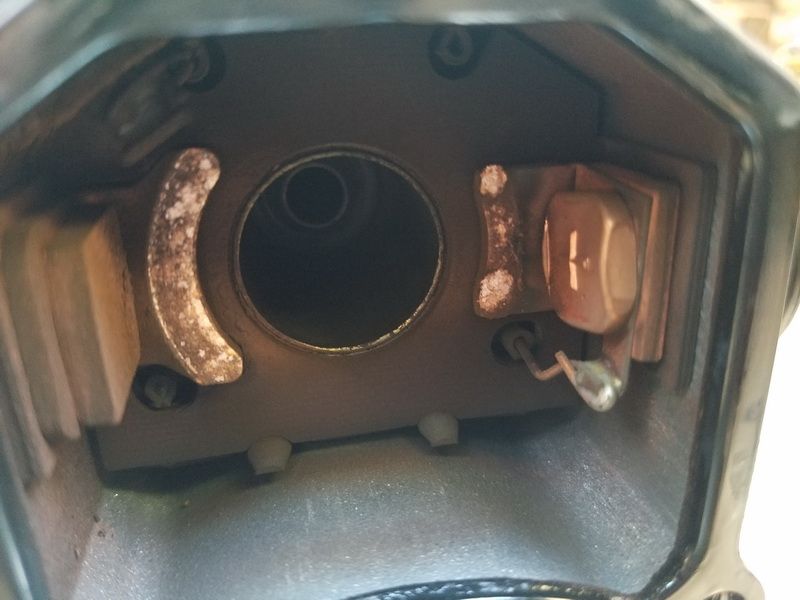
At this point, you'll want to check that the contacts are relatively thick and evenly worn. In this example there are ok and I didn't replace them but if you need to replace them, you'll want a soldering iron to undo and reattach the wire on the + terminal on the right. The terminals are held in place with nuts from the outside of the starter. Something to note is to make sure the contacts are perfectly level to the plunger when you tighten the new ones in place. The brushes are soldered so you'll need a soldering iron to remove them and reattach new ones.
Gearbox:
If your starter motor whirs when you turn the gear but doens't turn the engine over, it could be the bendix gear. This special gear is what allows the starter motor to engage with the flywheel and turn it round and round when required but to pull away and hide when the diesel or petrol engine has started.
To open up the gearbox, you'll need to access the 2 philips head screws at the pinion end of the starter. You'll want a larger philips head screwdriver and I suggest dousing these with a bit of WD-40 and letting it soak before you try to undo these.
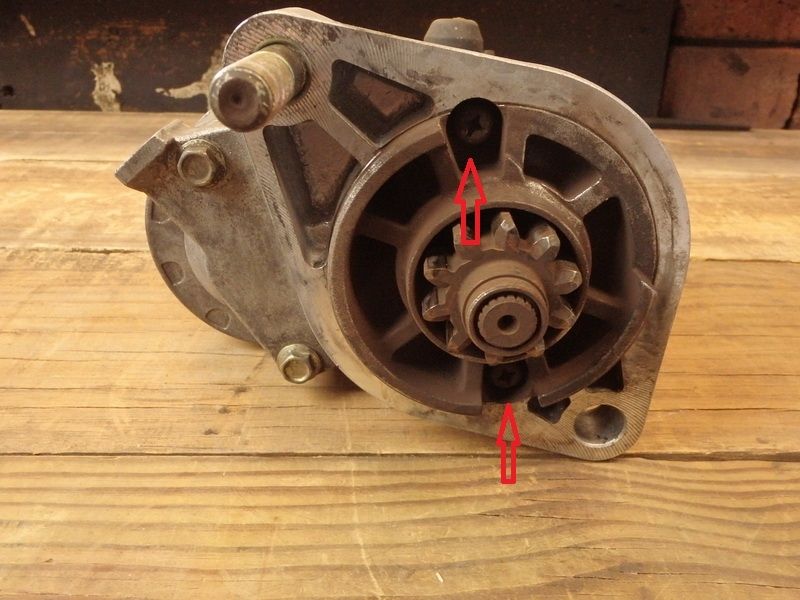
You'll be able to split the end of the gearbox off maybe with a few taps from a rubber mallet
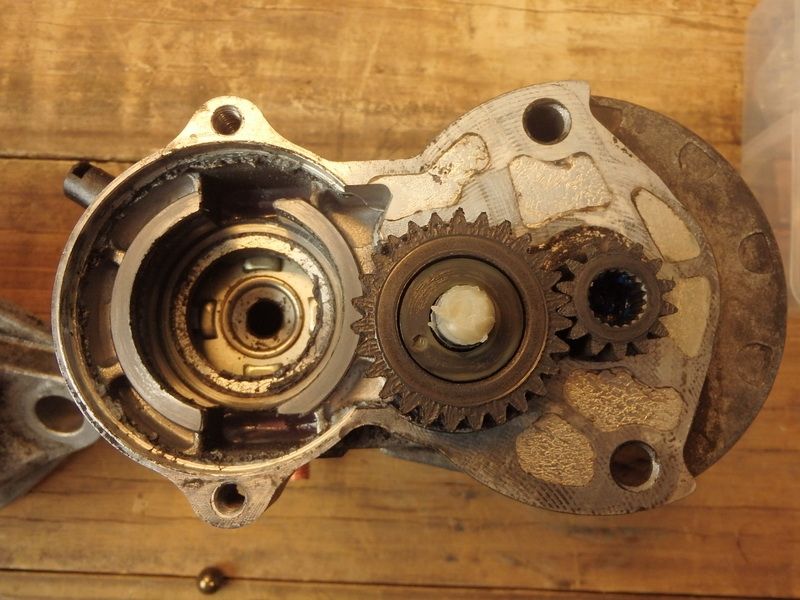
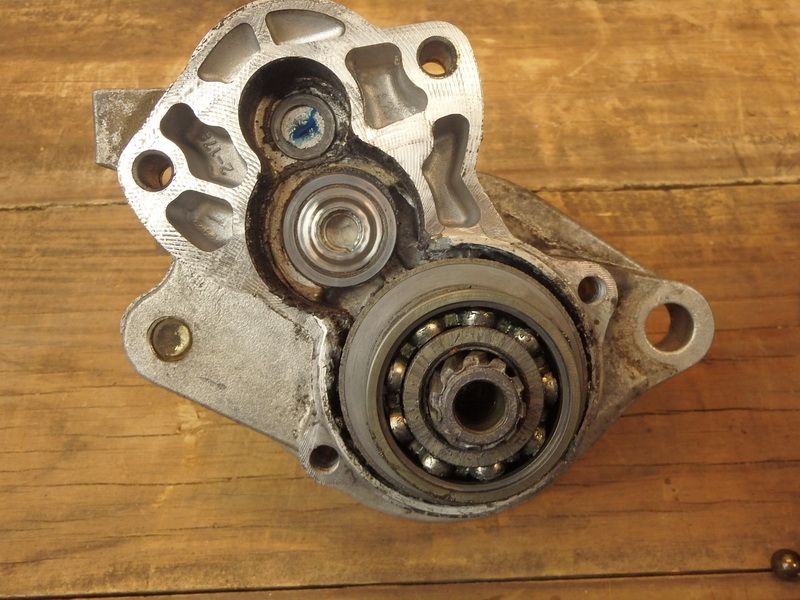
Once you seperate these you'll find a small gear at on the right hand side with a spline inside it, a medium size idler gear in the middle and the bendix gear at the other end. In the photo, the bendix gear isn't visible but you'll see a single ball bearing. What ever you do, DO NOT LOSE THIS!. It goes into the hole where in the bottom of where the bendix gear goes on the left.
In the next photo is the other half with the bendix gear on the bottom right. It is seen here with a ball bearing facing the camera.
To disassemble the bendix gear, I placed it in the vice (gentle pressure only) and revealed the circlip seen on the far left. A screwdriver will remove it and a little experimentation will put it back into place when you are finished. Take note of the order of the parts and orientation of the washer betwen the pinion and clutch gear.
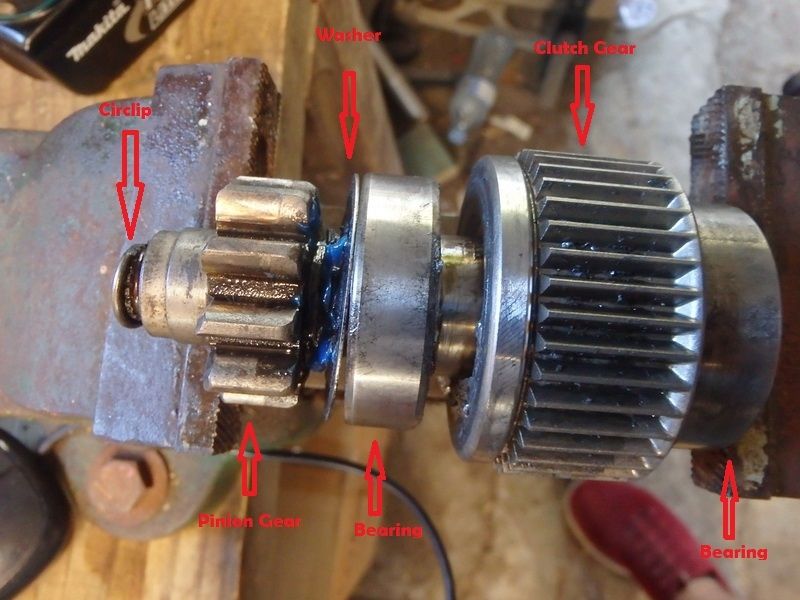
The parts are shown below and in my case, I replaced the bendix gear complete with new bearings attached. Assembly is the reverse of this.

I bought a kit with all the parts but only used the bendix gear and the plunger but I don't think is genuine Toyota parts. Next time, I'd hunt down the parts and use genuine just for peace of mind.